Tutorial - Buat Loading page sebelum masuk ke dalam blog anda
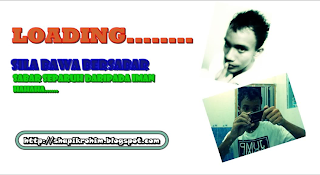

Alright, kali ni shafiq nk ajr korang buat
Loading page seperti gamba di atas ni. Ok tuto ni mungkin mengambil mase lama jugk tp ape salahnya kita bersabarkan. Sabar itu separuh drpd iman...


hehehe..
1) Ubah url blog anda sekarang dgn url yg lain.
2) Korang create satu blog baru dgn carenye
Dashboard>Create a blogNote: isi url blog anda dgn url blog anda yg lama yg telah diubah tadi tu.
Contoh: url lame shafiq
http://shapikrohim.blogspot.com tp shafiq dh tukar kepada
http://my-name-is-shafiq.blogspot.com. So shafiq isi url blog baru itu dgn url lama shafiq
 3)
3) Mase create tu isilah maklumat2 yg dikehendaki termasuk url blog anda yg baru.

Lepas dh abis create, make sure tukat jenis template anda ke
CLASSIC TEMPLATE dengan cara pergi
Design>Edit HTML> Klik 'Revert to Classic Template'' dkt bawah sekali.4) Then, copy code di bawah ni
<!DOCTYPE html PUBLIC "-//W3C//DTD XHTML 1.0 Transitional//EN" "http://www.w3.org/TR/xhtml1/DTD/xhtml1-transitional.dtd">
<html xmlns="http://www.w3.org/1999/xhtml">
<head>
<meta http-equiv="Content-Type" content="text/html; charset=utf-8" />
<title>TITLE BLOG ANDA</title>
</head>
<meta http-equiv="REFRESH" content="5;url=url blog anda">
<img src="URL GAMBAR ANDA">
<noembed><body></noembed>
</body>
<br><font face="arial" size="1" color="#737373"><b>
</html>
Paste code tersebut diruangan EDIT HTML Classic Template blog yg anda baru tubuhkan itu
MAKE SURE DELETE SEMUA CODE DI SITU BARU GANTIKAN CODE DGN CODE YG DI ATAS NI
6) Save.....
NEWER POST | OLDER POST | HOME
Profile

Full Name
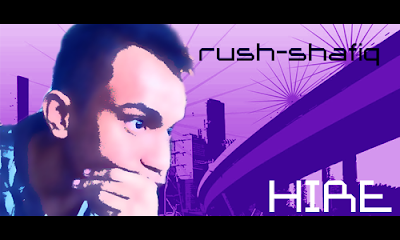
Muhammad Rushafiq bin Rohim
Glamour name
Rush Shafiq or Rush or Shafiq
Birthday
20 April 1994 (about 18 years old)
Born place
Hospital Tengku Ampuan Rahimah, Klang
Live
Meru, Klang, Selangor.
Status
Single but not available
Idols
Nabi Muhammad SAW
Sultan Muhammad Al-Fateh
Salahudin Al-Ayubi
Thariq bin Ziyad
Britney Spears
Maher Zain
Hobies
Badminton
Facebooking
Photo editing
Dreaming
Outing
Eating
Singing
Dancing
Teaching people
Like to
Chicken chop
Ice lemon tea
Mathematics
Cute animal
Caring friends
Hate to
Some vegetables
Being boring
Bully
Copycat, anons, hater
Arrogant people
Show off
Liar
My sites
Facebook
Twitter Formspring Blogskin
Skype
rushafiq_feeq
Tempahan
Hai semua, di sini adalah tempat untuk membuat tempatan. Saya telah menyediakan anda beberapa jenis tempahan termasuk harga masing2 iaitu:
Header: RM8
Banner: RM5
Edit Blog: RM13
Edit gambar: RM5
Design background: RM10
Welcome note: RM5
Murah je kan? hehehe..Jika anda ingin membuat tempahan, sila layari ke akaun profile facebook saya dan inbox saya dan nyatakan url blog anda, jenis tempahan dan ciri-ciri tempahan anda. Cara bayarannya ialah WANG POST sahaja. Anda boleh mengepos wang anda setelah anda berpuas hati dengan design yang contoh anda mahukan. Setelah wang kiriman telah diterima, barulah saya akan bagi yang ASLI punyer. Alamat untuk pengeposan akan diberitahu sekiranya anda ingin mengeposkan wang anda. Sebarang pertanyaan, please ASAP me. Thank you :)
Hello, Assalamualaikum. My name is Muhammad Rushafiq or known as Rush Shafiq/Rush/Shafiq. I'm 18 years old. The owner of this blog. Thank you for visiting my simple blog. Please come again soon :)


